
Why do northern lights look different in photos? The answer comes down to biology and physics. Cameras use slow shutter speeds of 10–25 seconds that accumulate far more light — gathering light and collecting light the human eye can collect in real time. Human vision shifts in low light conditions to rod-dominant scotopic mode — highly sensitive to brightness but nearly colour-blind. Camera sensors stack photons until the full wavelength range registers, revealing vibrant hues the unaided eye couldn’t saturate. Understanding this gap is how you get the most out of both the real-world experience and the photographs you take.
The First Night Always Surprises People — Just Not Always How They Expect
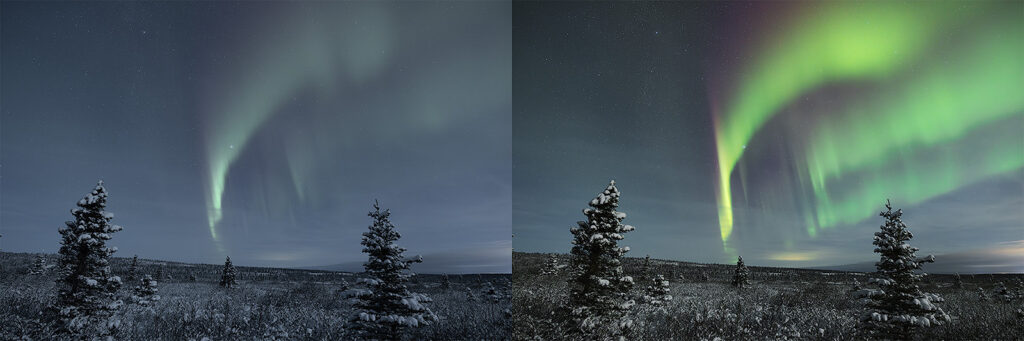
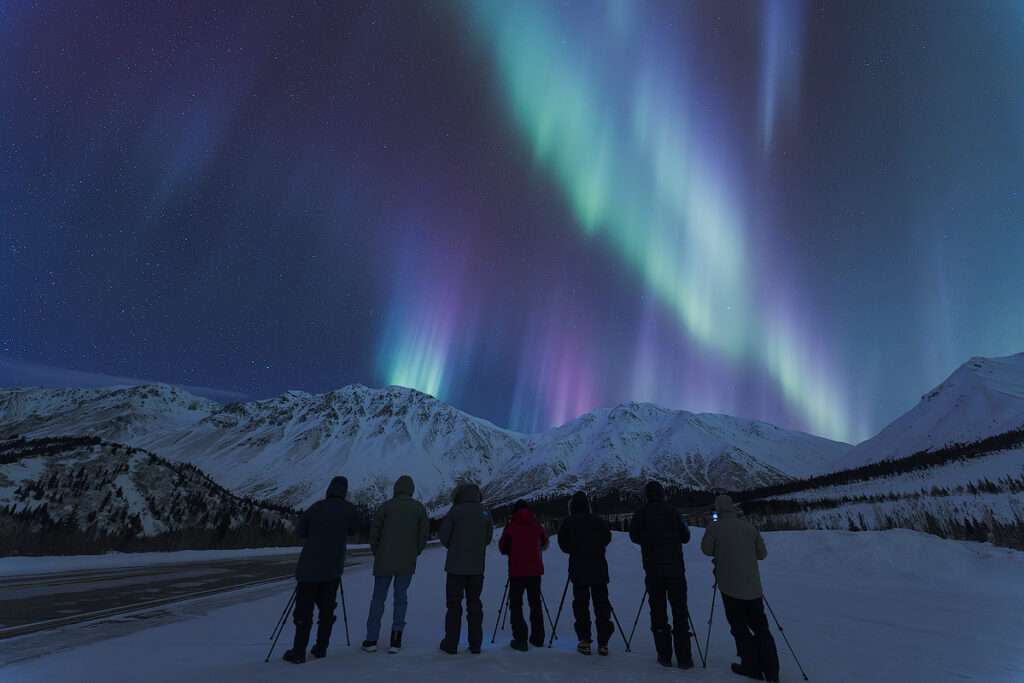
On the first night of many aurora trips, a participant reviews the image on their camera screen and sees vivid curtains — a display far more colourful and intense than the pale glow they see in the actual sky overhead. They look from the screen to the night sky and back. “Is that the same thing?”
It is. And the reason why is genuinely surprising about aurora photography — and why lights look different in photos.
How Your Eyes Respond Under the Night Sky — The Science of Low Light
Scotopic vs. Photopic Vision
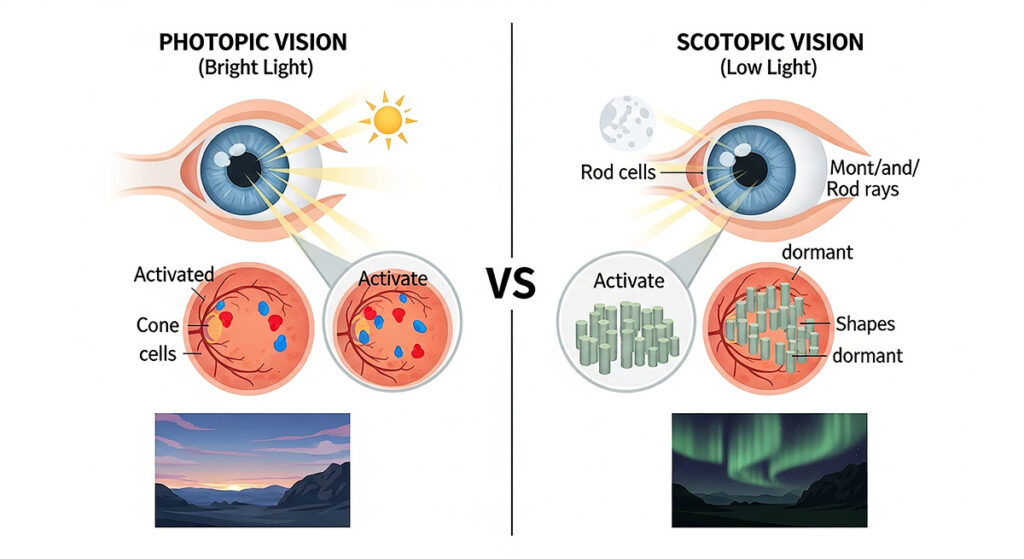
Your eyes have two photoreceptors: cone cells for colour in bright light, and rod cells for low-light perception. As your eyes adapt to darkness — a process taking 20–30 minutes — vision shifts from photopic to scotopic mode. Rod cells are far more sensitive to dim light but detect luminance rather than hue. The result: you gain sensitivity but lose colour resolution. This is why the display appears as a pale or near-white arc on quiet nights when the camera renders vivid, saturated bands.
Where the Aurora’s Green Sits in Your Visual Sensitivity Range
The aurora’s dominant emission at 557.7nm comes from excited oxygen atoms at 100–150km altitude. Scotopic vision peaks around 505nm. That 50nm gap means your eyes detect this light but struggle to saturate it as vivid colour in darkness. On Kp 2–3 nights, many observers see a pale lime glow or near-white arc — exactly what the camera sees as brighter, more vivid green. The emission is real. Your own eyes simply aren’t calibrated to register it with full intensity in low light conditions.
Why Cameras See More Color
Camera sensors do not shift into scotopic mode. A longer exposure at ISO 1600 collects light — every photon across the full window — including faint violet from ionized nitrogen and subtle red from high-altitude oxygen. This is why the camera sees more colour than the human eye: it isn’t selecting the way scotopic vision does. The camera also captures a wider dynamic range, recording detail across both bright curtains and the dark night sky simultaneously. The camera isn’t wrong. It isn’t exaggerating reality. What looks faint to your eyes appears vibrant in photographs because it captures the full light spectrum that is genuinely there — every picture reveals more than the eye saw.
When Do Northern Lights Look Different to the Naked Eye vs. Camera?
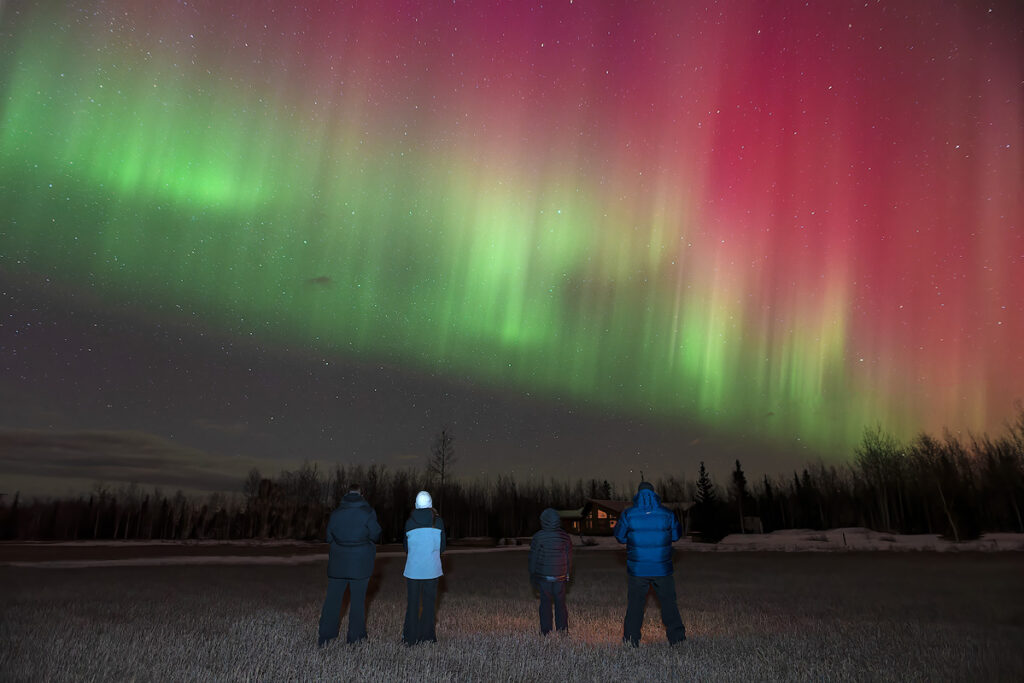
The Kp index measures geomagnetic activity. At Kp 2–3, the northern lights appear as a pale horizon-level arc to unaided observers while the camera captures vivid colour and tonal range. At Kp 4–5, the display becomes genuinely colorful to dark-adapted eyes and violet fringes appear at the curtains’ lower edge. During a big aurora at Kp 6+, solar storm activity makes the display bright enough that the colour gap between eye and camera nearly closes — visible to unaided observers as a colourful, dynamic display spanning the entire sky, sometimes visible as far south as the northern United States. Cloud cover can obscure any display regardless of Kp level — learn how to read the aurora forecast before you go so you know what conditions to expect each night.
Altitude, Color, and the Atmosphere’s Role
The colour of a northern lights display maps directly to altitude and atmospheric gas:
- Green (100–150km): Atomic oxygen emitting light at 557.7nm — the most common aurora borealis colour worldwide, visible in Fairbanks across autumn and winter nights.
- Red (above 200km): Sparse oxygen atoms emitting at 630nm. Rarer, requiring intense geomagnetic storms.
- Blue and purple (below 100km): Ionized nitrogen molecules in the 391–470nm range — the lower fringe of active curtains.
Pink and magenta appear where blue-violet nitrogen signals mix with the oxygen emission above. Light pollution and moonlight reduce visible hues for both unaided vision and the camera.
Stop Trying to Match What You See — Start Capturing What’s Really There
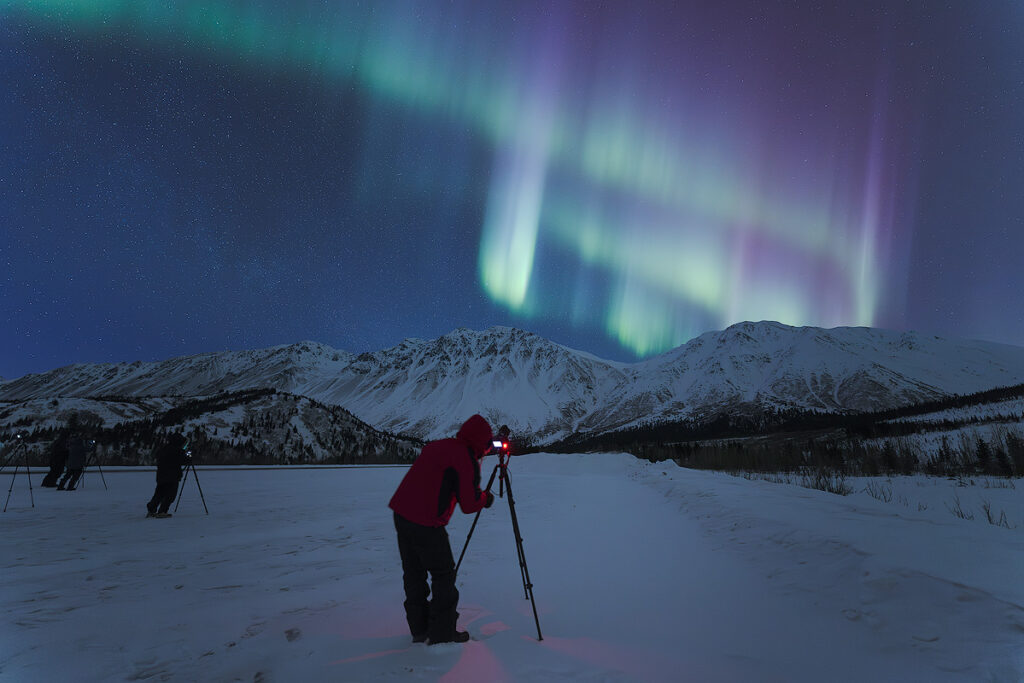
Understanding the contrast between eye and camera helps you use your settings intentionally. Modern phone cameras can capture the northern lights reasonably well using night mode, but for authentic colour, a camera with manual controls and the right settings captures what the eye misses.
- Shutter speed: 5–15 seconds for active displays; 20–25 seconds for faint arcs. Multiple exposures at different settings reveal the full dynamic range. Beyond 25 seconds, star trails appear and background stars begin to streak, and stars create unwanted trails.
- Aperture: f/1.8–f/2.8 — maximum light collection and best low light performance
- ISO: 800–3200 depending on aurora brightness
- White balance: 3500–4500K manual; auto balance cools images
- Focus: Manual, set to infinity
- Scene: Include a foreground element — dark treeline, frozen lake, roofline — for scene depth and compositional context
The Takeaway: Different Isn’t Worse
There is beauty the camera cannot replicate: the scale, the the cold silence, the aurora borealis movement of curtains overhead of a February or March night in Alaska with the display active overhead. There is also beauty your own eyes cannot access in real time — the full palette of the northern lights exists in the spectrum, but long exposure is what translates it into a vivid photograph. What the camera captures and what your eyes perceive are both honest — here’s what to expect when you actually stand under the northern lights for the first time. The difference is that the camera shows you everything that was there.
Frequently Asked Questions
Why do the northern lights look white or dim to the naked eye on quiet nights?
On Kp 2–3 nights, the the northern lights’ 557.7nm emission sits at the edge of dark-adapted sensitivity. These receptors detect brightness, not hue — so observers see near-white or pale lime light where a camera registers vivid green. Dark adaptation of at least 20–30 minutes in truly dark skies improves colour perception, but genuine vivid naked-eye colour requires Kp 3–4 and above.
Does the moon affect how the northern lights look in photos vs. real life?
Yes. A bright moon raises the visibility threshold — it washes out subtle displays for both unaided vision and the camera, though cameras compensate with longer exposure times. A new moon provides the darkest skies and the greatest contrast between what the human eye sees and what a camera sensor captures. On a really good night — brighter displays under a new moon, photographs will reveal colour unaided vision could only barely perceive.
What camera settings best show what the eye can’t see?
Use a slow shutter speed of 10–20 seconds, f/2.8, ISO 1600, manual focus at infinity. This allows camera sensors to accumulate the faint violet from nitrogen and subtle reds from high-altitude oxygen that unaided vision can’t saturate. Shoot in RAW format and adjust white balance to 3500K in post-processing to bring out the full palette. The resulting photographs will look more vivid than what you saw, because they capture the full spectrum the eye was receiving but couldn’t fully process.
Why do some aurora photographs look amazing but the actual display seemed faint?
This is the eye-versus-camera gap at work. The northern lights produce real light at real wavelengths — the sensor registers every photon across a 10–20 second window while your eyes process in real time in scotopic mode. A display that appears as a faint, pale arc to the naked eye on a Kp 2 night can produce colourful, striking photographs. The photographs aren’t exaggerated. They’re a more complete picture of the phenomenon your eyes were experiencing but not fully seeing.
Can you photograph the northern lights with a phone camera?
Modern phone cameras can capture aurora using night mode, which applies computational long-exposure processing. Results vary based on Kp level, sky conditions, and phone generation — phones do best on high-Kp nights in truly dark skies. For reliable results across the full range of aurora activity, including faint displays and subtle hue differentiation, a dedicated camera with manual controls captures more of what the human eye missed.