
A Local Guide’s Detailed Packing List for Staying Warm While Chasing the Aurora
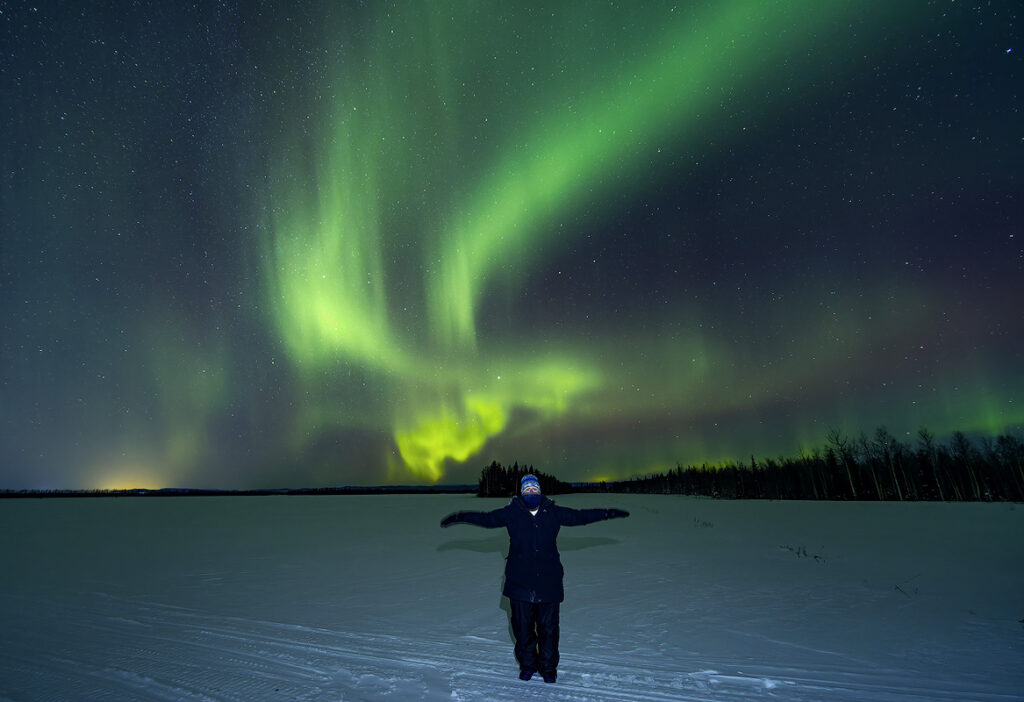
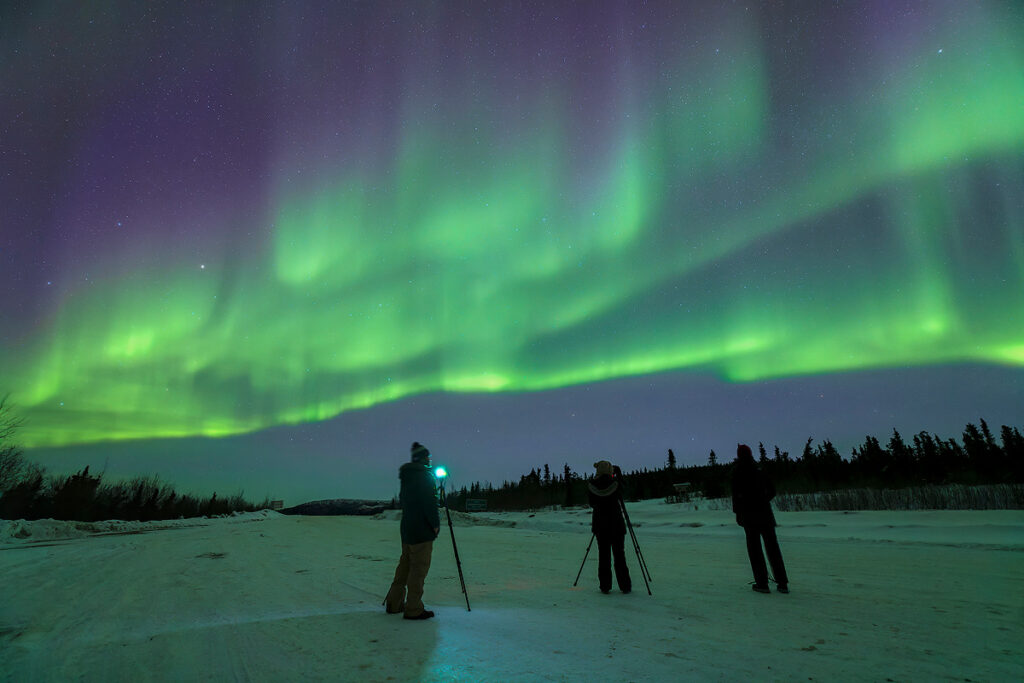
A complete northern lights packing list is the difference between an unforgettable aurora (aurora borealis) experience and cutting your viewing short because you can’t feel your toes. After 20+ years guiding aurora tours in Interior Alaska, I’ve watched hundreds of visitors underestimate just how cold it gets—and how long you’ll be standing outside waiting for the lights to dance.
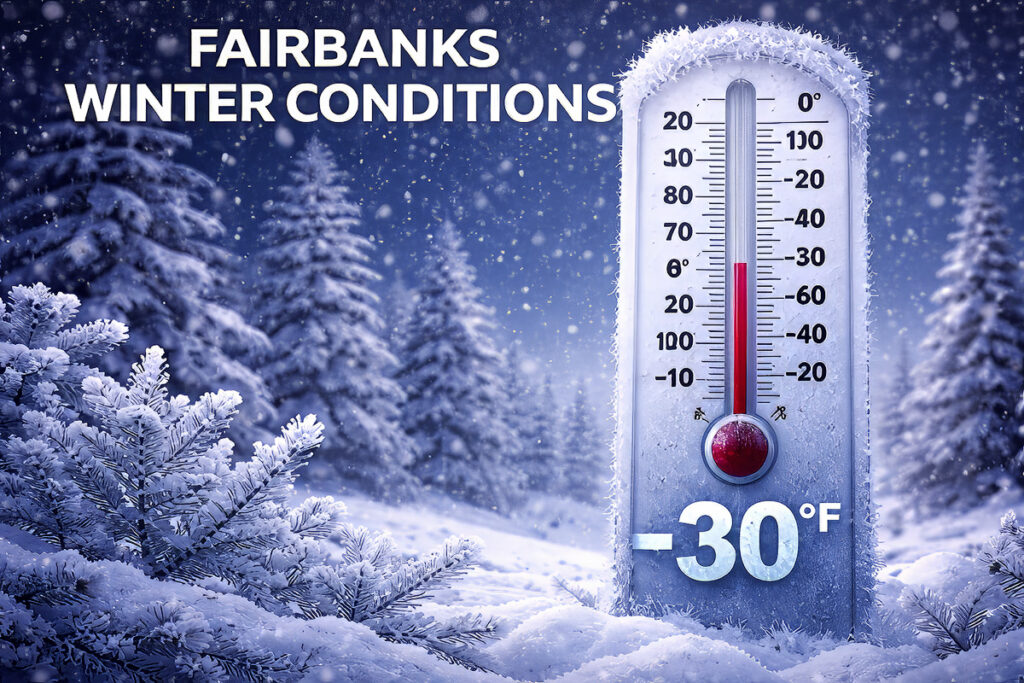
Fairbanks winter temperatures regularly drop to -20°F, and on the coldest nights can plunge below -40°F. You’ll be outside for three to six hours at a time, often standing still, staring at the sky. This isn’t a quick walk from your car to a restaurant—it’s extended exposure to genuinely dangerous cold during aurora chasing. The right gear isn’t optional; it’s essential.
This guide covers everything you need to know about what to pack for aurora viewing in Alaska: the layering system that actually works, specific product recommendations, Fairbanks winter clothing essentials, photography gear considerations, and a printable checklist you can use while packing. Whether you’re joining a guided tour or viewing independently, this northern lights packing list will keep you warm, comfortable, and prepared so you can stay focused on the sky—not on the cold.
Why Proper Gear Matters for Northern Lights Viewing in Alaska
Interior Alaska operates on a different scale of cold than most visitors have experienced. A “cold” winter night in the lower 48 might be 20°F. In Fairbanks during aurora season, that’s a mild evening. The coldest months—December through February—routinely see cold temperatures between -20°F and -40°F, with wind chill pushing perceived temperatures even lower.
Here’s what that means practically: exposed skin can develop frostbite in under 10 minutes at -25°F. At -40°F, that window shrinks to under 5 minutes. You’ll be standing outside for hours watching for aurora activity, often in the middle of the night when temperatures hit their lowest point. The difference between proper Alaska aurora viewing gear and inadequate clothing isn’t comfort—it’s safety.
Beyond safety, proper gear directly affects your experience. Cold hands mean you can’t operate your camera. Cold feet mean you’re thinking about the cold, not the aurora. I’ve seen guests miss spectacular displays because they had to retreat to a warm vehicle while others stayed outside and watched the sky explode with color. Don’t let inadequate preparation rob you of the experience you traveled thousands of miles to have—being well prepared makes all the difference.
The Complete Cold Weather Layers System for Alaska Aurora Viewing
The key to staying warm in extreme cold isn’t one massive jacket—it’s a layering system that manages moisture, traps heat, and blocks wind, providing essential protection against the elements. This approach has been refined by arctic explorers, mountaineers, and Alaskan locals for decades. Understanding cold weather layers Alaska style means understanding three distinct layers, each with a specific job.
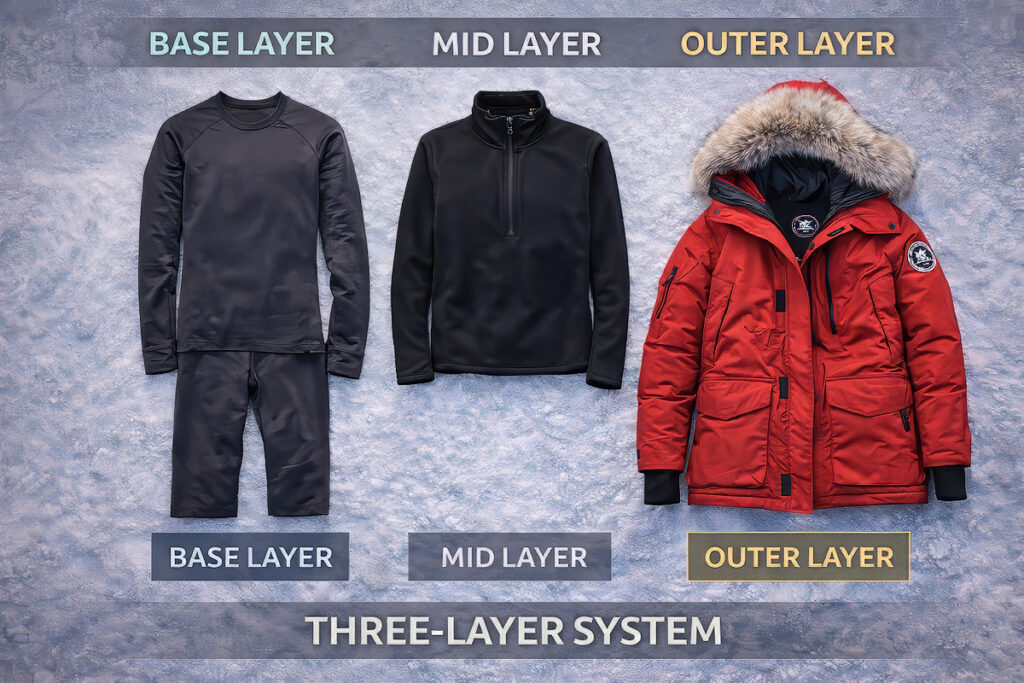
Base Layer: Moisture Management
Your base layer sits directly against your skin. Its job is to wick moisture (sweat) away from your body and move it to outer layers where it can evaporate. This is critical because wet fabric against your skin accelerates heat loss dramatically—even a small amount of dampness can make you feel significantly colder.
Best materials for base layers:
- Merino wool: The gold standard. As a natural material, merino wool is sustainable, temperature-regulating, moisture-wicking, odor-resistant, and comfortable against skin. Brands like Smartwool, Icebreaker, and Minus33 make excellent options. Look for 200–250 weight for Fairbanks conditions.
- Synthetic (polyester/polypropylene): Wicks moisture effectively and dries faster than wool. Less expensive but can retain odors. Patagonia Capilene and Under Armour ColdGear are solid choices.
What to avoid:
- Cotton. Cotton absorbs moisture and holds it against your skin, making you colder. “Cotton kills” is a mantra in cold-weather circles for good reason. Leave the cotton t-shirts and jeans at home.
Recommended base layer setup: Merino wool long-sleeve top (midweight, 200–250g) + merino wool leggings or long underwear. This combination provides excellent warmth-to-weight ratio and works well whether you’re active or standing still.
Mid Layer: Insulation
The mid layer’s job is simple: trap warm air. This is where most of your warmth comes from. The best mid layers create thousands of tiny air pockets that hold your body heat close.
Best materials for mid layers:
- Down: Highest warmth-to-weight ratio. Compresses easily for packing. Look for 600–800 fill power. Downside: loses insulating ability when wet. Best for dry cold (which Fairbanks typically has).
- Synthetic insulation (PrimaLoft, Thinsulate): Retains warmth even when damp. Slightly heavier and bulkier than down for equivalent warmth. Good backup option if you tend to sweat or conditions might be damp.
- Fleece: Excellent warmth, breathes well, dries quickly. Heavier and bulkier than down or synthetic. Works well as a mid-mid layer under a puffy jacket.
Recommended mid layer setup: A 200–300 weight fleece jacket or vest as your first mid layer, plus a down or synthetic puffy jacket (650+ fill power) as your primary insulation. For the coldest nights (-30°F and below), you may want both.
Outer Layer: Wind and Weather Protection
Your outer layer’s job is to block wind and any precipitation. Wind is the enemy—it strips away the warm air your mid layers have trapped. Even light wind at -20°F creates dangerous wind chill.
What to look for in an outer layer:
- Windproof: Non-negotiable. The shell must completely block wind. Gore-Tex is a top choice for a waterproof and wind-resistant shell that remains lightweight and breathable.
- Breathable: Allows moisture vapor to escape so you don’t get clammy inside your layers.
- Snow-resistant: Fairbanks is dry, but you may encounter light snow. A DWR (durable water repellent) finish handles this well.
- Length: A longer jacket (mid-thigh or below) keeps your core and upper legs warmer. Shorter jackets let cold air in when you bend or sit.
Recommended outer layer setup: An insulated parka rated to at least -20°F (ideally -40°F) with a windproof outer layer, or a separate windproof/waterproof shell over your insulating layers. Many visitors find an expedition-weight parka like those from Canada Goose, Arc’teryx, or The North Face Summit Series sufficient as a single outer layer.
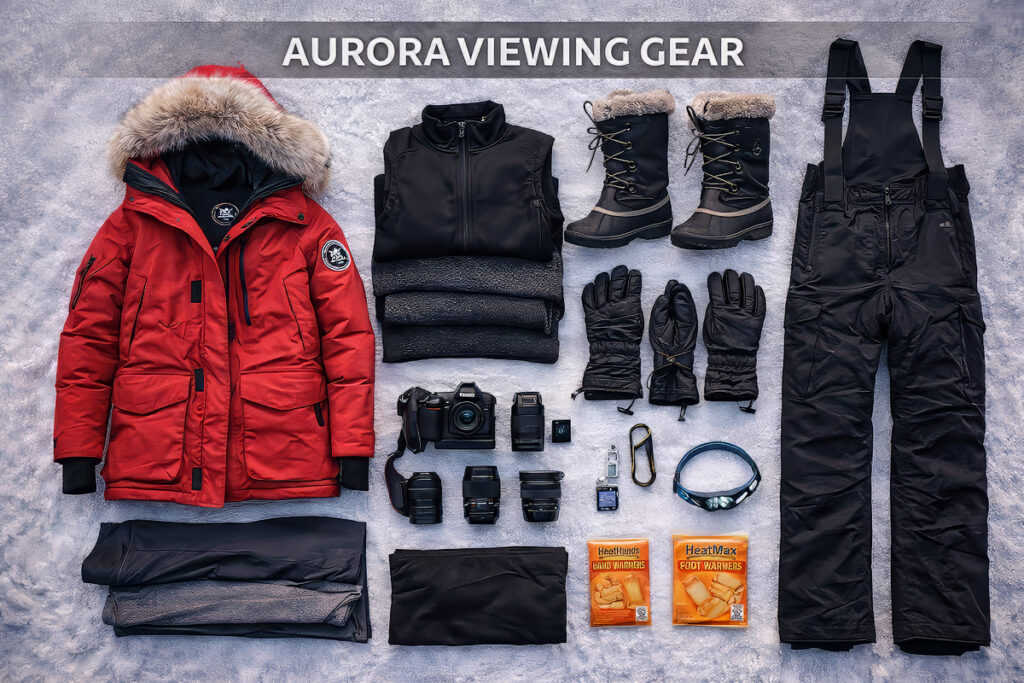
Fairbanks Winter Clothing Essentials: Your Complete Checklist
Beyond the layering system, specific items of Fairbanks winter clothing make a significant difference in your comfort and safety. These essentials are key to helping you stay warm during aurora viewing in Alaska’s harsh winter conditions. Here’s the complete list of what I recommend to every guest on our aurora tours:
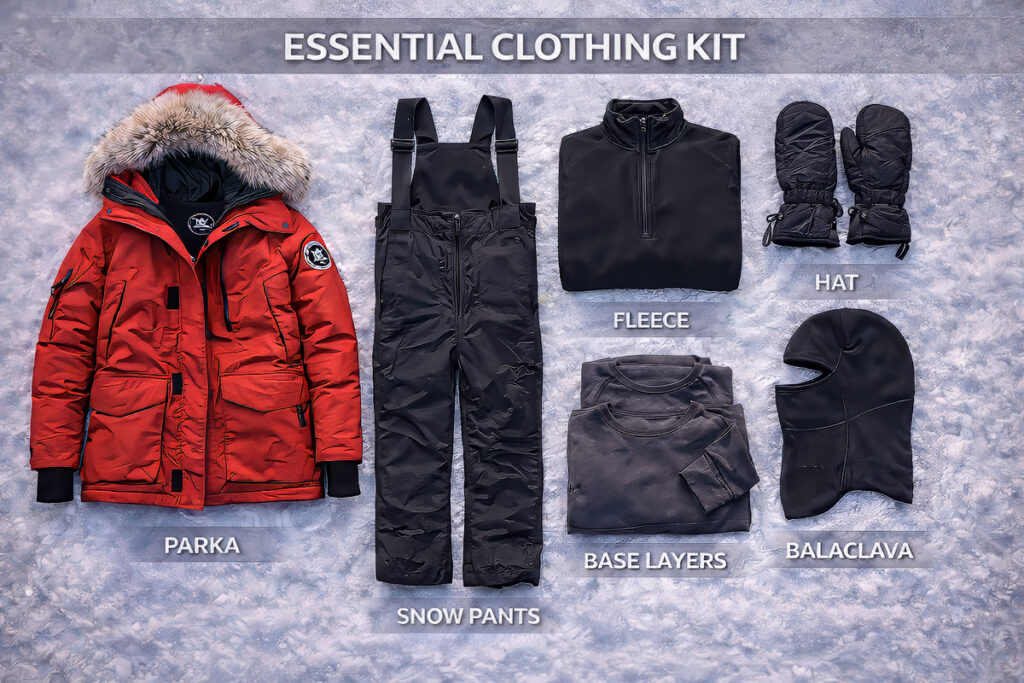
Upper Body
- Base layer top: Merino wool or synthetic long-sleeve, midweight
- Mid layer 1: Fleece jacket or vest (200–300 weight)
- Mid layer 2: Down or synthetic puffy jacket (650+ fill)
- Outer layer: Insulated parka or windproof shell rated to -20°F minimum
- Neck gaiter or balaclava: Covers neck and can be pulled up over face
- Warm hat: Fleece or wool, must cover ears completely. A hat with earflaps or a bomber-style hat works well
Lower Body
- Base layer bottoms: Merino wool or synthetic long underwear
- Mid layer: Fleece pants or additional insulated layer (for coldest nights)
- Outer layer: Insulated snow pants or ski pants, windproof and water-resistant
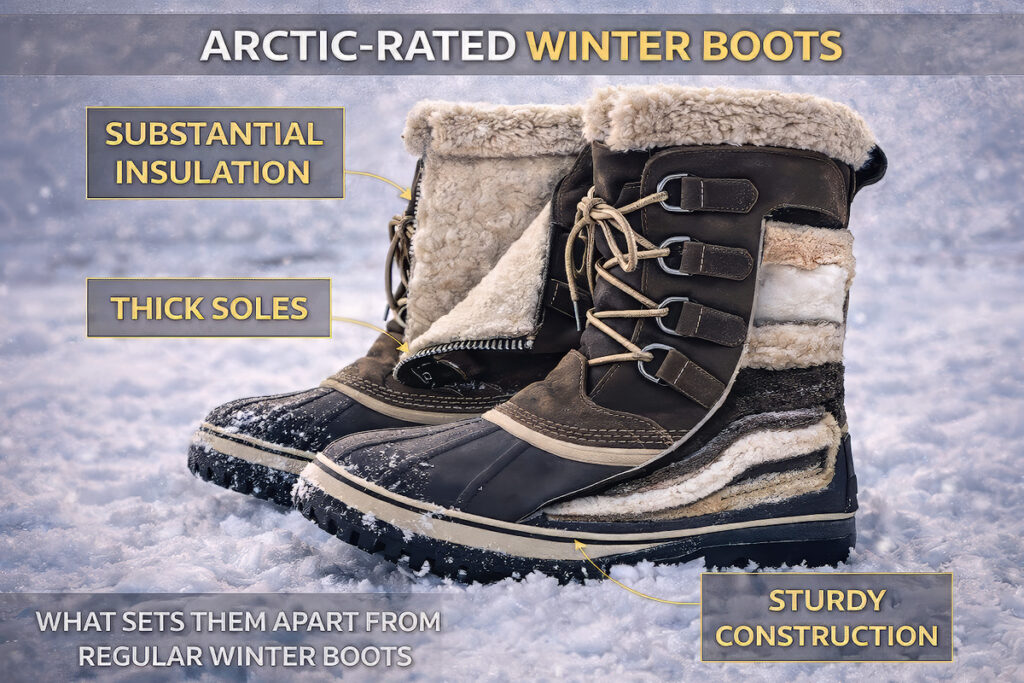
Feet – Winter Boots Alaska Requirements
Your feet are the most vulnerable part of your body when standing in extreme cold. Blood flow to extremities decreases as your body prioritizes keeping your core warm, making proper footwear absolutely critical. The right winter boots Alaska conditions demand are rated to at least -40°F.
- Insulated winter boots: Rated to -40°F or colder. Baffin, Kamik, and Sorel make excellent options. Look for boots with removable felt or Thinsulate liners.
- Wool socks: Heavyweight merino wool, not cotton. Bring 2–3 pairs of socks per night of aurora viewing to ensure you always have a dry pair ready.
- Sock liners (optional): Thin synthetic or silk liners add warmth and wick moisture from your feet.
- Vapor barrier liners (optional): For extreme cold (-40°F+), VBL socks worn inside your regular socks prevent moisture from reaching your insulation.
Critical boot notes: Your boots need to be roomy enough to accommodate thick socks without compressing them (compression kills insulation) and without restricting blood flow. If your boots feel snug with thick socks, they’re too small for arctic conditions. Error on the side of sizing up. Also, boots should be worn “broken in” before your trip—blisters at -30°F are miserable.
Hands
Hands are notoriously difficult to keep warm because they have little insulating fat and are far from your core. A layered approach works for hands just like the rest of your body.
- Liner gloves: Thin fleece or merino gloves you can wear while operating a camera or phone. These allow you to make quick adjustments without exposing bare skin.
- Insulated mittens: Mittens are warmer than gloves because your fingers share warmth. Look for mittens rated to -20°F or colder with removable liners.
- Hand warmers: Disposable chemical hand warmers (HotHands brand or similar) provide 6–10 hours of supplemental heat. Bring at least 2 pairs per viewing night. These are not optional—they’re essential backup when temperatures drop.
- Mitten clips or tethers: When you remove mittens to operate a camera, you don’t want to drop them in the snow. Tethers keep them attached to your sleeves.
Face and Head
At extreme cold, any exposed skin becomes a liability. Your face needs protection.
- Balaclava: A full-face balaclava that covers everything except your eyes is ideal for the coldest nights. Look for fleece or merino wool.
- Neck gaiter/buff: Can be pulled up over nose and mouth. More versatile than a balaclava for milder conditions.
- Ski goggles (optional): If wind chill is severe, ski goggles protect your eyes and the skin around them. Clear or yellow lenses work best for night viewing.
- Warm hat: Fleece-lined with ear coverage. Bomber/trapper hats with fold-down earflaps are popular in Alaska for good reason.
- Hood: Your parka hood provides essential backup protection. Look for fur or synthetic fur ruffs—they create a windbreak around your face.
What to Pack for Aurora Alaska: Gear by Temperature Range
What you need to pack depends partly on when you’re visiting. Here’s a breakdown of typical Fairbanks temperatures during aurora season and the corresponding what to pack aurora Alaska recommendations:
| Month | Typical Temps | Key Gear Notes |
|---|---|---|
| Late Aug–Sep | 25°F to 55°F | Light layers. Fleece + windproof shell often sufficient. Nights can get chilly—bring warmer options for late-night viewing. |
| October | 5°F to 30°F | Full layering system needed. Insulated boots essential. Hand warmers recommended. |
| November | -10°F to 10°F | Heavy insulation required. Expedition-weight parka, insulated snow pants, boots rated -40°F. |
| December–January | -30°F to -5°F | Maximum protection. Full face coverage essential. Multiple hand warmers per night. Double up mid layers. |
| February | -20°F to 10°F | Still very cold but moderating. Full cold weather kit but may not need maximum face coverage on warmer nights. |
| March | -10°F to 20°F | Variable conditions. Pack for cold but may have surprisingly mild nights. Layers allow flexibility. |
| April | 10°F to 35°F | Milder but still cold at night. Full layering system, may not need heaviest insulation. |
Note: These are typical ranges. Temperatures can vary significantly, and nighttime viewing temperatures are always at the colder end of the range. Always pack for colder than expected. Fairbanks winters are notably dry—rain is not a concern—but a waterproof outer shell handles light snow, and a waterproof phone pouch protects your device from condensation when moving between cold and warm environments.
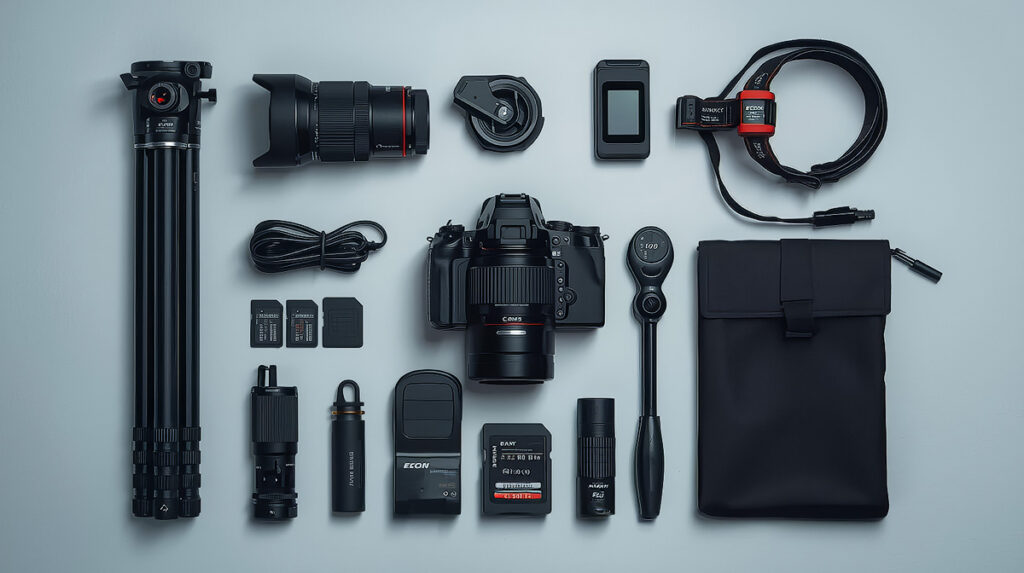
Northern Lights Photography Gear: What to Pack for Aurora Shots
If you’re planning to photograph the aurora, your northern lights photography gear requires specific preparation for extreme cold. A sturdy tripod is an essential piece of aurora photography gear, as it is crucial for keeping your camera steady during long exposures. The cold affects batteries, LCD screens, and your ability to operate controls—and your camera gear needs protection from both temperature and condensation.
Essential Camera Equipment
- Camera with manual controls: DSLR or mirrorless camera where you can manually set ISO, aperture, shutter speed, and focus. Smartphone cameras are improving but still can’t match dedicated cameras for aurora shots.
- Wide-angle lens: 14mm–24mm focal length (full frame equivalent) with a fast aperture of f/2.8 or wider. The wider aperture lets in more light, allowing shorter exposures that capture aurora movement without blur.
- Sturdy tripod: Essential—you cannot handhold aurora shots. Carbon fiber handles cold better than aluminum (metal tripods become painfully cold to touch). Make sure legs lock securely.
- Remote shutter release or intervalometer: Prevents camera shake when triggering the shutter. Also useful for time-lapse sequences.
- Extra batteries (3–5 minimum): Cold drains batteries rapidly. A battery that lasts 500 shots at room temperature might manage 100 shots at -20°F. Keep spares inside your jacket, close to body heat, and rotate them.
- Extra memory cards: You’ll shoot more than you expect. Bring at least 64GB total capacity.
Photography Accessories for Cold Weather
- Lens cloth/cleaning supplies: Condensation and frost can form on your lens. A microfiber cloth and lens pen help keep optics clear.
- Headlamp with red light mode: Red light preserves your night vision while allowing you to see camera controls. Essential for adjusting settings in darkness.
- Hand warmers for batteries: Wrap a hand warmer around your battery grip or tape one near the battery compartment. This extends battery life significantly.
- Power bank: A power bank is essential for keeping your camera and phone charged during long nights outdoors, especially in cold conditions when batteries drain faster.
- Ziplock bags (large): When bringing cold camera gear into warm spaces, condensation forms on and inside the camera. Seal your camera in a plastic bag before going inside—condensation forms on the bag instead of your gear.
- Rain cover or plastic bag: Protects camera from light snow while shooting.
Camera Settings Reference for Aurora
Here’s a quick reference for aurora photography settings to get you started:
- ISO: Start at 1600–3200. Increase to 6400 for faint aurora, decrease for bright displays.
- Aperture: Wide open (lowest f-number your lens allows—f/2.8 or wider is ideal).
- Shutter speed: 5–15 seconds depending on aurora movement. Faster aurora requires shorter exposures to preserve detail. Slower, steady aurora can use longer exposures.
- Focus: Manual focus set to infinity. Use live view zoomed in on a bright star to dial in precise focus.
- White balance: Auto works, or try 3500–4500K for natural-looking greens.
Pro tip: Practice your camera settings before you go. You should be able to change ISO, aperture, and shutter speed by feel, in the dark, with gloves on. Fumbling with unfamiliar controls while aurora is dancing overhead means missed shots.
Rent or Buy? Sourcing Your Alaska Aurora Viewing Gear
Not everyone wants to invest in arctic-rated clothing for a single trip. The good news: you can rent winter clothing in Fairbanks, with local services offering quality Alaska aurora viewing gear for short-term use.
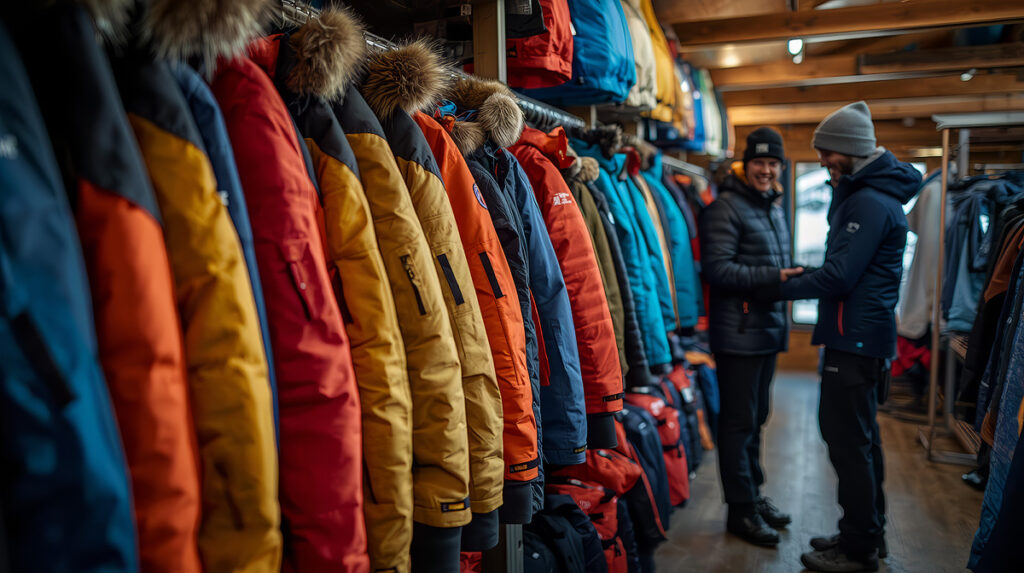
What to Rent
These items make sense to rent if you don’t anticipate regular use:
- Expedition-weight parka: A quality arctic parka costs $400–$1,000+. Rental is typically $25–75 for your trip.
- Insulated snow pants: Usually bundled with parka rental.
- Winter boots: If you don’t already own boots rated to -40°F, renting is smart. Make sure rental includes thick socks or bring your own.
- Insulated mittens: Often included in tour packages or available to rent separately.
What to Buy/Bring
These items are worth owning or are impractical to rent:
- Base layers: You want these to fit well and be clean. Worth owning—they’re useful for any cold-weather activity.
- Merino wool socks: Essential, inexpensive, and useful beyond this trip.
- Balaclava/neck gaiter: Personal item, inexpensive, hard to rent.
- Hand warmers: Disposable, buy a box before your trip or at an Anchorage or Fairbanks outdoor store.
- Camera gear: Bring your own if serious about photography. Rental options exist but are limited.
Where to Rent in Fairbanks
- Most aurora tour operators do not provide cold-weather gear—come prepared with your own layers, boots, and accessories, or rent from a local outfitter before your tour.
- Alaska Outdoor Gear Rental (Fairbanks) specializes in winter clothing and equipment.
- University of Alaska Fairbanks Outdoor Adventures rents gear to visitors during certain periods.
- Big Ray’s (local outfitter) sells gear if you decide you’d rather own than rent.
Our recommendation: If you don’t plan to use bulky arctic gear again after your trip, rent from a Fairbanks outfitter instead of buying. Alaska Element and Alaska Outdoor Gear Rental offer expedition parkas, insulated boots, and snow pants at a fraction of the purchase price. Reserve ahead during peak aurora season (February–March) when inventory goes fast.
Smart Packing Tips for Your Northern Lights Trip
How to Pack Bulky Winter Gear
Arctic clothing takes up space. Here’s how to manage it:
- Compression bags: Down jackets and puffy layers compress dramatically. Vacuum-seal or compression bags reduce volume by 50–70%.
- Wear your heaviest items: Wear your parka and boots on the plane. They’re bulky but don’t count against luggage weight.
- Layer in your carry-on: Pack one complete set of base layers and an insulating layer in your carry-on. If your checked bag is lost, you can still function.
- Check bag weight limits: Winter gear is heavy. Most domestic US flights allow 50 lbs checked. Weigh your bag before leaving.
What to Leave at Home
- Cotton anything: Cotton t-shirts, jeans, cotton socks—leave them all home.
- Fashion winter coats: That stylish wool peacoat won’t cut it at -20°F.
- Regular winter boots: Unless rated to -40°F or colder, they’re not adequate.
- Umbrella: It doesn’t rain in Fairbanks in winter. Snow brushes off.
- Excessive camera gear: Stick to essentials. You won’t change lenses constantly in the cold.
Carry-On Essentials for the Flight
- Warm hat and gloves (in case you’re stuck somewhere cold)
- One complete base layer set
- All camera bodies and lenses (never check valuable electronics)
- Medications
- Phone charger
- Copy of accommodation and tour confirmations
Complete Northern Lights Packing List: Printable Checklist
Use this comprehensive northern lights packing list to make sure you don’t forget anything. Print it out and check items off as you pack.
Clothing – Upper Body
- ▢ Base layer top (merino wool or synthetic) × 2
- ▢ Mid layer fleece jacket or vest
- ▢ Down or synthetic puffy jacket
- ▢ Insulated parka (rated -20°F or colder)
- ▢ Windproof shell (if parka is not windproof)
Clothing – Lower Body
- ▢ Base layer bottoms (merino wool or synthetic) × 2
- ▢ Fleece pants or mid layer bottoms
- ▢ Insulated snow pants
Footwear
- ▢ Insulated winter boots (rated -40°F)
- ▢ Heavyweight wool socks × 4–6 pairs
- ▢ Sock liners (optional)
- ▢ Comfortable indoor shoes/slippers for lodge
Hands
- ▢ Liner gloves × 2 pairs
- ▢ Insulated mittens (rated -20°F or colder)
- ▢ Hand warmers (10+ pairs)
- ▢ Mitten clips/tethers
Head and Face
- ▢ Warm hat with ear coverage
- ▢ Balaclava or neck gaiter × 2
- ▢ Ski goggles (for extreme cold, optional)
Photography Gear
- ▢ Camera with manual controls
- ▢ Wide-angle lens (f/2.8 or wider)
- ▢ Sturdy tripod
- ▢ Remote shutter release
- ▢ Extra batteries × 4–5
- ▢ Memory cards (64GB+ total)
- ▢ Lens cleaning supplies
- ▢ Headlamp with red light mode
- ▢ Large Ziplock bags for camera
Accessories and Miscellaneous
- ▢ Toe warmers (10+ pairs)
- ▢ Sunglasses (for daytime snow glare)
- ▢ Lip balm with SPF
- ▢ Moisturizer (dry cold air is harsh on skin)
- ▢ Reusable water bottle
- ▢ Snacks for late-night viewing
- ▢ Hand sanitizer
- ▢ Small backpack for carrying extras during viewing
Download the above checklist + added free dress code Ebook below.
Frequently Asked Questions About Packing for Northern Lights in Alaska
Do I really need boots rated to -40°F?
Yes. Standing still in snow for hours is the ultimate test of boot insulation. Boots rated to -20°F will feel cold within an hour at that temperature when you’re not moving. The -40°F rating provides a safety margin. You can always take them off if you’re too warm (you won’t be), but you can’t make inadequate boots warmer.
Can I use my regular winter coat?
It depends on the coat and the conditions. If you’re visiting in September or late March and temperatures are mild (above 10°F), a standard winter coat might suffice. For December through February viewing, or any time temperatures drop below 0°F, you need serious insulation. When in doubt, rent an expedition parka.
What if I run hot and tend to overheat?
The layering system handles this. Start with fewer layers and add as needed. You can always remove a fleece layer if you’re too warm. What you can’t do is add insulation you didn’t bring. Pack for the coldest expected temperature, then adjust down.
Are hand warmers allowed on planes?
Yes. Unused chemical hand warmers (like HotHands) are permitted in both carry-on and checked luggage by the TSA. They’re readily available at outdoor stores in Fairbanks and Anchorage, or you can bring them from home.
Should I bring my own sleeping bag?
Not unless you’re camping, which is not recommended for aurora viewing in winter. Hotels, lodges, and cabins provide bedding. You don’t need to pack sleeping gear for a standard aurora trip.
What about my phone? Will it work in the cold?
Smartphones struggle in extreme cold. Battery life drops dramatically, and touchscreens can become unresponsive. Keep your phone inside your jacket, against your body. Some guests use dedicated phone pouches with hand warmers. Don’t rely on your phone for critical functions when it’s -30°F.
Do tour operators provide any gear?
Most don’t. At Face The Outdoors, we provide warm drinks and heated lodge access during tours—but you’ll need to bring your own cold-weather clothing and hand warmers, or rent gear from a Fairbanks outfitter before your tour. Always confirm what’s included when booking any aurora tour.
Ready to Pack for Your Alaska Aurora Adventure?
Proper preparation is the foundation of a successful aurora trip. With the right northern lights packing list and appropriate Fairbanks winter clothing, you’ll stay comfortable through hours of viewing—free to focus on the sky instead of the cold.
Face The Outdoors small-group tours (max 10 guests) include active sky-chasing, photography instruction, warm drinks, and heated lodge access between viewing sessions. Plus, our Aurora Commitment guarantee means if you don’t see aurora, you can join another tour at no extra cost during your trip.
Related Reading (Internal Links)
- How Many Nights for Northern Lights in Fairbanks? →
- Northern Lights Forecast in Alaska →
- Best Place to See Northern Lights Fairbanks: Do You Need a Tour? →
- Learn How to Photograph the Northern Lights →
About the Author
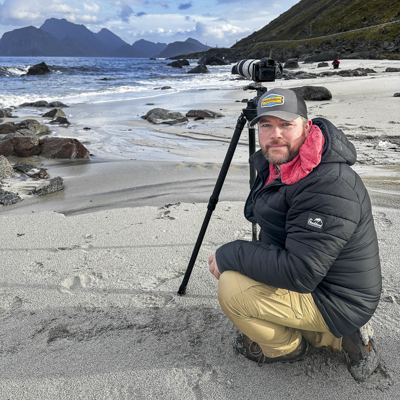
Michael runs Face The Outdoors, a family-operated aurora tour company based deep in Alaska’s interior. Born and raised in Alaska, the northern lights have been part of his life for as long as he can remember. Face The Outdoors was recommended by National Geographic as a premier aurora tour option in the Fairbanks area. He lives with his family at the same property where guests experience the aurora — under some of the darkest skies in Interior Alaska.